The Bible to Quality Care: 1. First and foremost is the devloping stage. If anything goes wrong during this stage it will cause all sorts of defects to the negs. Usually it is due to developing time, or temperature but can also be caused by chemical activity. This can cause fogging or reticulation (cracking caused by chemical activity).
2. If processing is a success, then comes one of the most critical and time-consuming procedures. Cleaning is imperative to the negatives. If negatives are not properly cleaned, unwanted chem or water spots will appear.
PROCEDURE:
Hypo-clear to remove remaining hypo (fixer), I usually agitate consistently for about 1-2 minutes. However, don't agitate too strong to prevent scratching of negs. Rinse for 10 minutes or longer under running water about 65 to 75 deg, the longer you rinse the more successful you are at preventing chem-spots. I usually then rinse the negs in a large tray under running water with a solution of water and photo-flo, agitating the negs consistently. Pull negs out of tray, hang, squegee, and let dry. Don't touch them until dry unless you notice spots. If spots are present then repeat procedure. Usually if you clean well with hypo-clear and use a minimal amount of photo-flo you avoid this problem. The problem with photo-flo is that it makes the solution sudsy thus increasing the risk of spots. Because of this I rarely use photo-flo, but it is all personal preference.
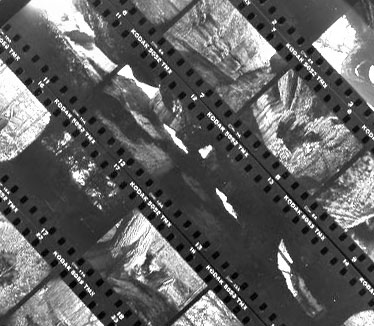
3. Storage, as well as cleaning is important. You wouldn't want all your hard work in cleaning be done in vain. The most important thing is that negs should not be exposed to any adverse elements. This could drastically shorten the life of a neg. Believe me! I stored a set of negs in a paper envelope back in high school. Now, the dust has damaged them beyond repair.
Procedure:
After negs are dried, cut into 4 or 5 frame increments. It's usually done in 4 frame increments because this prevents crimping or curling. You can use scissors or a large table cutter. I choose to use the table cutter because I can make more even cuts without having to worry about cutting into one of the frames. After negs are cut, place emulsion (dull side) face down in a transparent negative file. These can usually be purchased from a camera shop for about 10 cents a piece. These are great to have because they really do a nice job of keeping dust away from the negs. After you placed them in the file, put them away in a binder or some other place, as long as it is away from dust and extreme temperatures which can eventually degrade the quality of the negs.
I've stuck to these procedures for some time and they have never really failed me. However, this doesn't mean you should take me for my word exactly. To really advance in the darkroom, I found that originally trying someone's techniques, I eventually evolved and developed my own with similarities to others. |